 PostGIS
 Mobile
 QGIS
QGIS MapBender
 GeoServer
 GeoNode
 GeoNetwork
 Solutions


133 lines
2.6 KiB
ReStructuredText
133 lines
2.6 KiB
ReStructuredText
|
|
Quick Start
|
|
=====
|
|
|
|
This is a Quick Start Guide for our QWC2 Hosting.
|
|
|
|
Note that each item is covered in detail in subsequent sections of this documentation.
|
|
|
|
|
|
1. Install the QGIS Plugin.
|
|
~~~~~~~~~~~~~~~~~~~~~~~~~~
|
|
|
|
.. image:: images/plugin-install.png
|
|
|
|
|
|
2. Launch Plugin
|
|
---------------------------
|
|
|
|
Launch the plugin by going to Web > QWC2
|
|
|
|
.. image:: images/plugin-1.png
|
|
|
|
|
|
|
|
|
|
3. Enter Server Information
|
|
~~~~~~~~~~~~~~~~~~~~~~~~~~
|
|
|
|
Enter your credentials
|
|
|
|
1. In the QWC2 plugin, give your server a name
|
|
2. Enter your hostname (e.g. geo.webgis1.com)
|
|
3. Enter your email and password
|
|
4. Click Save
|
|
|
|
|
|
.. image:: images/plugin-2.png
|
|
|
|
.. note::
|
|
Close the plugin and open it again if the Server is not visible immediately.
|
|
|
|
|
|
.. image:: images/plugin-3.png
|
|
|
|
|
|
|
|
4. Create Tenant
|
|
~~~~~~~~~~~~~~~~~~~~~~~~~~
|
|
|
|
While not required, it is strongly recommended to create at least one new Tenant.
|
|
|
|
Doing so will leave the Default Tenant empty so subsequent Tenants will start cleanly.
|
|
|
|
Click Tenant on the left menu, give your Tenant and name and click Create
|
|
|
|
|
|
.. image:: images/plugin-5-create-Tenant.png
|
|
|
|
You should see a success message like below
|
|
|
|
.. image:: images/plugin-6-create-Tenant
|
|
|
|
|
|
.. note::
|
|
If you have created mutliple Tenants, be sure to connect as the correct Tenant
|
|
|
|
|
|
|
|
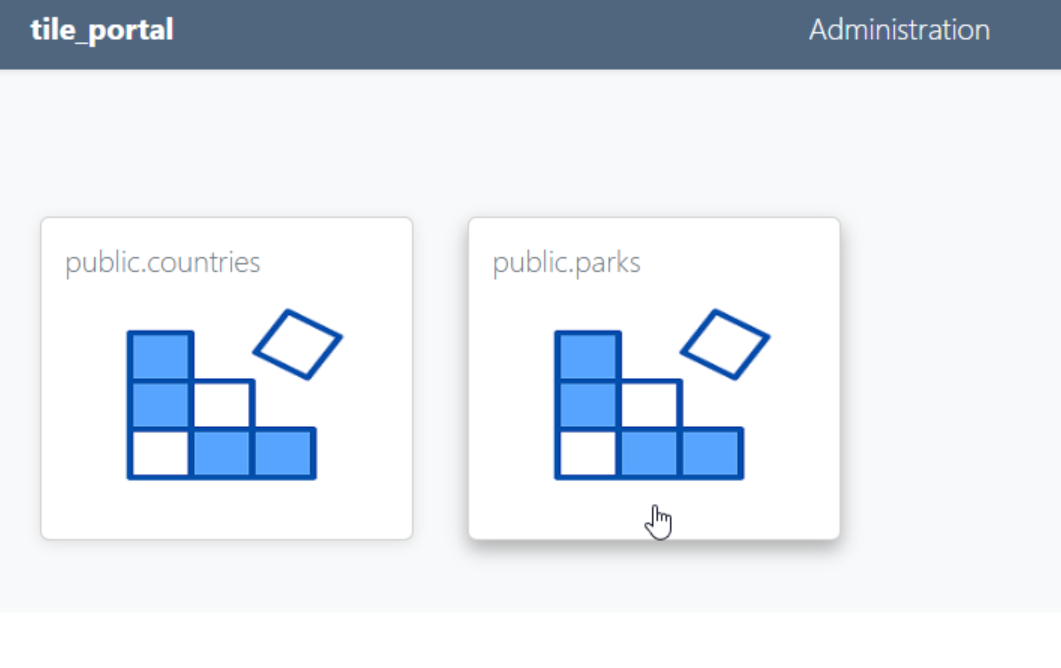
4. Upload
|
|
~~~~~~~~~~~~~~~~~~~~~~~~~~
|
|
|
|
|
|
Click Upload on the left menu
|
|
|
|
.. image:: images/plugin-7-create-Tenant.png
|
|
|
|
Select Server (if more than one) and Tenant from the dropdowns.
|
|
|
|
Check the Configure button to automatically run the QWC2 Configure Utility
|
|
|
|
.. image:: images/plugin-7-create-Tenant.png
|
|
|
|
|
|
Click Upload
|
|
|
|
.. image:: images/plugin-9-create-Tenant.png
|
|
|
|
On successful upload it should appear as below
|
|
|
|
|
|
.. image:: images/plugin-10-create-Tenant.png
|
|
|
|
|
|
5. Publish
|
|
~~~~~~~~~~~~~~~~~~~~~~~~~~
|
|
|
|
Click Publish on the left menu
|
|
|
|
|
|
.. image:: images/plugin-11-create-Tenant.png
|
|
|
|
|
|
Select Server, Tenant, Theme (QGIS Project). Give your Map a name a description.
|
|
|
|
Select if Map should be Public or not. If not Public, assign Groups that will have access.
|
|
|
|
If you have not created any Groups yet, there will be only a Default Group
|
|
|
|
.. image:: images/plugin-12-create-Tenant.png
|
|
|
|
.. note::
|
|
If you have created mutliple Tenants, be sure to connect as the correct Tenant
|
|
|
|
You should now see a Success message like below with link to view the published Map
|
|
|
|
.. image:: images/plugin-13-create-Tenant.png
|
|
|
|
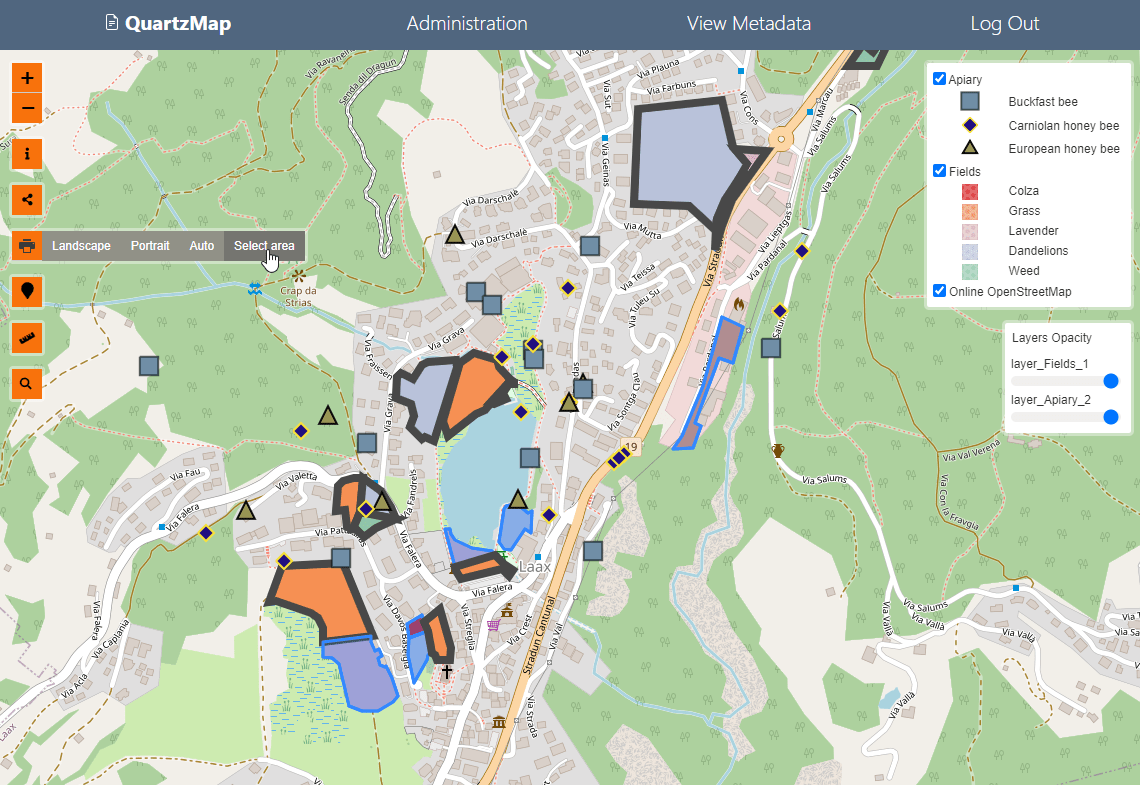
View the Map to verify everything is in oder
|
|
|
|
.. image:: images/Plugin-Done.png
|
|
|
|
|
|
Your map has been published!
|
|
~~~~~~~~~~~~~~~~~~~~~~~~~~
|
|
|
|
.. image:: images/qwc_published.png
|
|
|
|
.. note::
|
|
All settings can be modified via your QWC2 Control Panel after publication as well.
|
|
|
|
|
|
|
