Load ESRI Shapefile
Table of Contents
Preparing the Shapefile
When we loaded the shapefile into PostGIS earlier, we did so using shp2pgsql and the files remained zipped.
For creating a Store from a shapefile, we need to unzip the contents.
Connect via SSH and navigate to the //opt//data directory:
root@demo:~# cd /opt/data
Listing the contents, we see the three .zip file containing our data
root@demo:/opt/data# ls
neighborhoods.zip  parks.zip  waterways.zip
Unzip the waterways.zip file using ‘unzip -q waterways.zip’
root@demo:/opt/data# unzip -q waterways.zip
The contents are now unzipped:
root@demo:/opt/data# ls
neighborhoods.zip  waterways.dbf  waterways.shp  waterways.zip
parks.zip          waterways.prj  waterways.shx
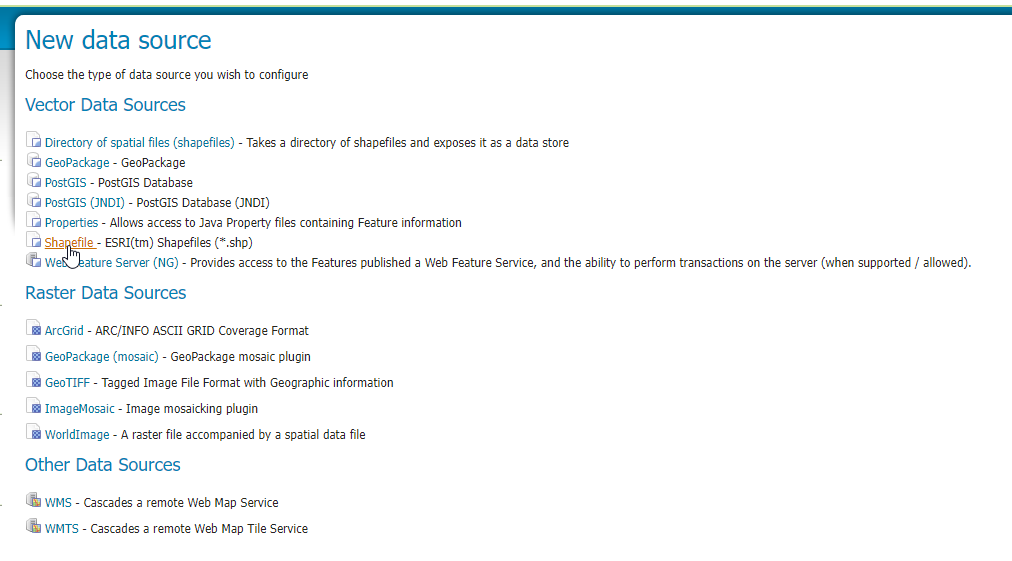
Create Shapefile Store
1. Go to Stores > Add New Store and click the Shapefile link:
2. For Workspace, select ‘postgis’ and enter ‘postgishp” for the name and description
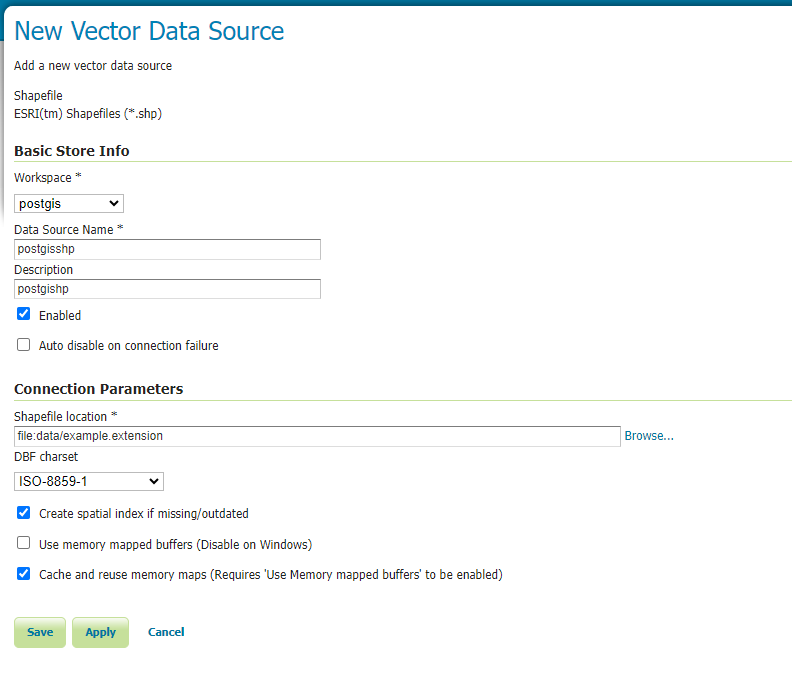
3. In the Connection Parameters, click the browse link

4. For shapefile location, select // from the dropdown
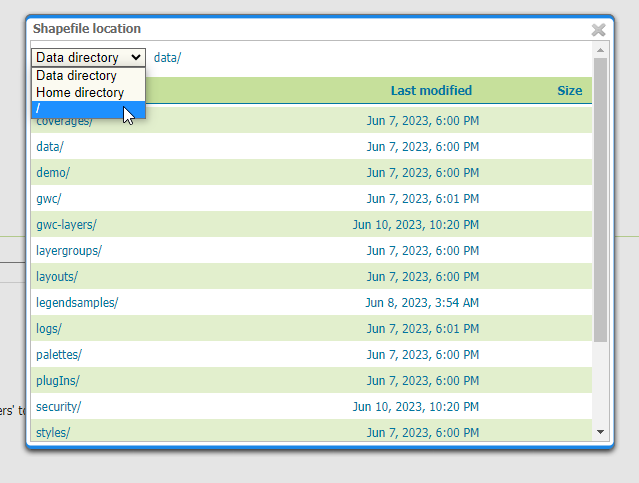
5. Navigate to //opt//data and select the waterways.shp file

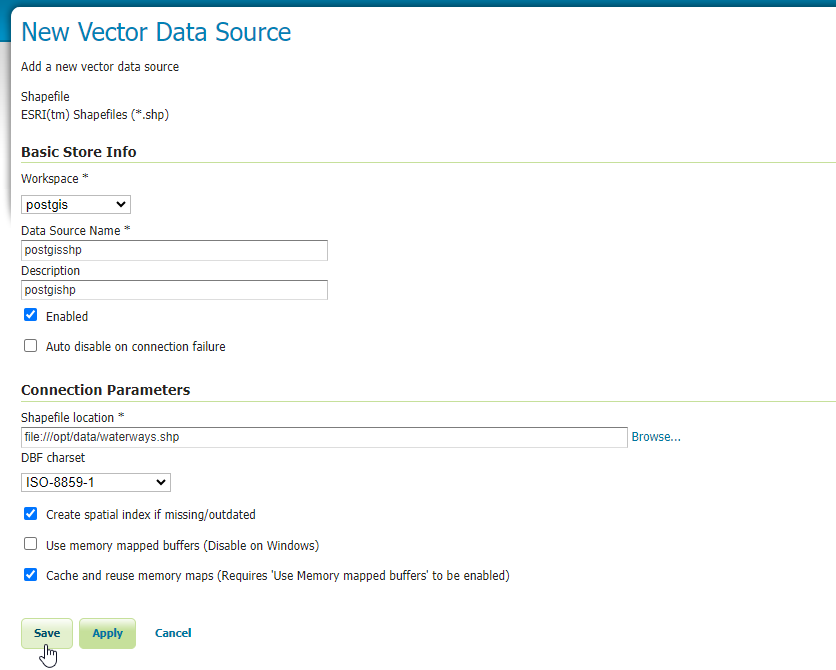
6. Click the Save button
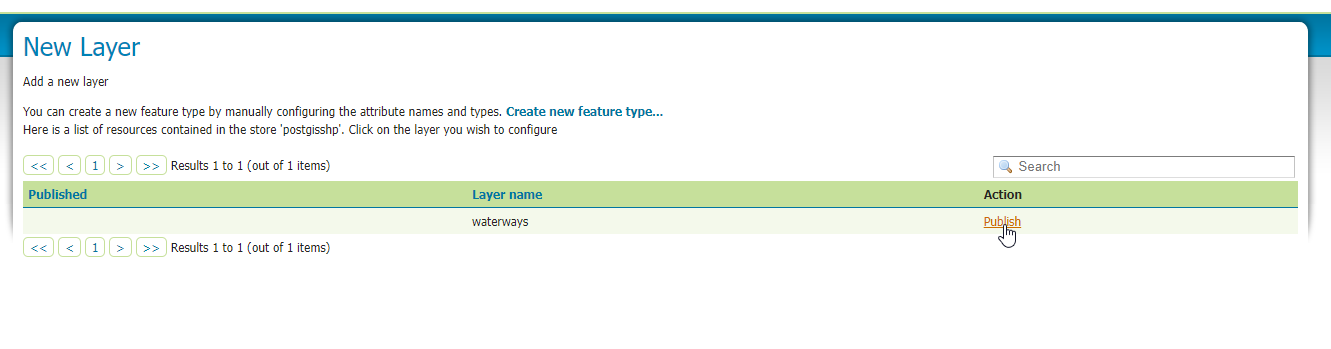
7. On the New Layer screen, click the Publish link
Enter the information as we did previously in Create Store